 button visible in the upper left corner of the image under edit. The following window should appear.
myCollection version 2.0 supports an online application to crop and rotate by multiple of 90 degrees the images of coins. To use this functionality the user should press 'Edit item...' menu point. In the editor window select 'Obverse and Reverse' tab, and click on button visible in the upper left corner of the image under edit. The following window should appear.
 In the appearing image editor window the following functions can be activated by the buttons here:
To select rectangular or elliptic crop tool click on the appropriate button. The mask with 8 positioning small boxes will appear to help crop region selection. Drag the positioning mask with the mouse over the area to be kept. With the small squares the size and shape of the mask can be set.
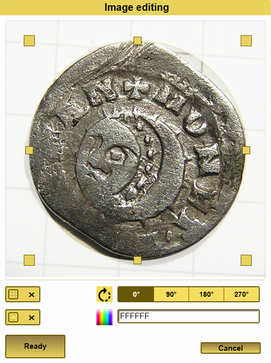 The image on the right shows when an elliptic crop is to be done. The are outside the cropping region appears dimmed, showing that only the inner part will remain after cropping. Because the crop is elliptic the region outside must be filled with some color. The user can select the color by clicking the editor field right to the color square. In the popup window
 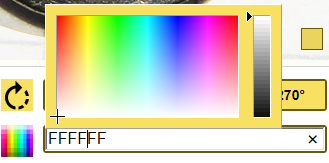 select the appropriate color.
Move the mask to its right place. If everything is set, click the 'Ready' button. In the control window (see below) the user can check the result of his action, before the new image will replace the old one.
If the image must be rotated by 90, 180 or 270 degrees clockwise, click on the desired number. The image cropping mask will be lost by this action, so preferably start image editing with rotation and go on with cropping.
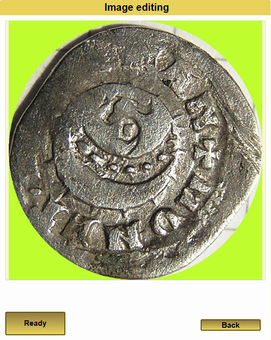 If all done with the editing click 'Ready' button. The image checking window will appear. In the example the image was rotated by 90 degree, cropped by an ellipse and the area outside the cropping was filled with green color. If the user finds some problem he may click in the 'Back' button to restart editing. If everything was fine click on the 'Ready' button again. In this case the new image will replace the old one in the 'Edit coin's and medal's data' window, but it will NOT be saved in the database yet. For the final save, click on the Ok button of the 'Edit coin's and medal's data' window. (This also means that if the user changes his mind and does not want the modify the image, he may still click on 'Cancel' button.)
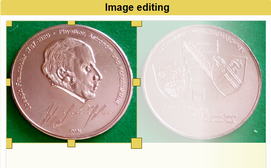 The image shows the case when image creator combined obverse and reverse image into one image. If the user wants to store obverse and reverse image separately in myCollection system, the first load both into obverse and reverse the same image. Then use online editor to edit obverse image first, cut the reverse part from it. (Showed left). Then edit reverse image, but delete the obverse side by this time.